4.2.2. Numbering
4.2.2. Numbering
Automatically assigns sequential numbers to components identified by the current mode along a selected pipeline.
Benefits: Once assigned, numbers are saved as a property on the respective object, ensuring consistency across all derivative documents. This means identical weld, spool, or part numbers will appear in the exact same position in every isometric drawing, bill of material, and weld list. Corrections to individual numbers are still possible at any time.
Procedure:
- Select the mode (Weld, Spool, or Part) from the drop-down list.
- Click "Numbering" in the ribbon.
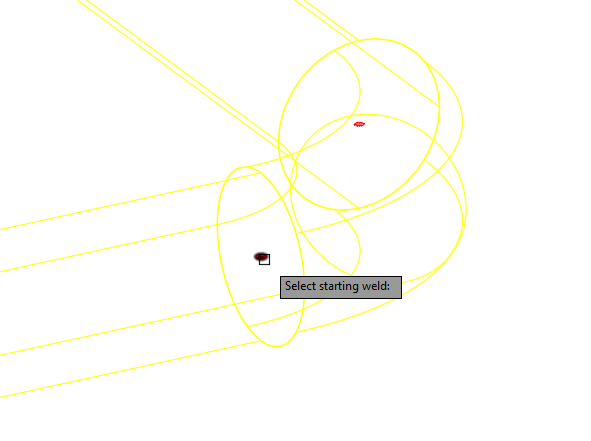
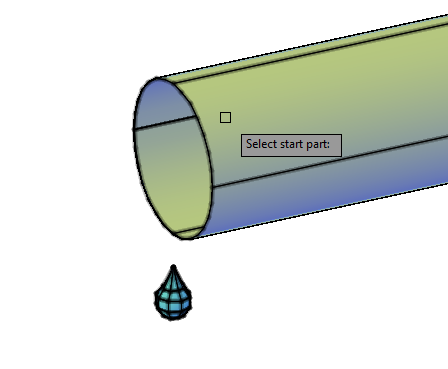
- Select a starting pipe, fitting, or weld in the drawing. This identifies the pipeline (via
LineNumberTag).
- A direction arrow will be displayed. You will be prompted to Accept, Reverse direction, or Cancel.
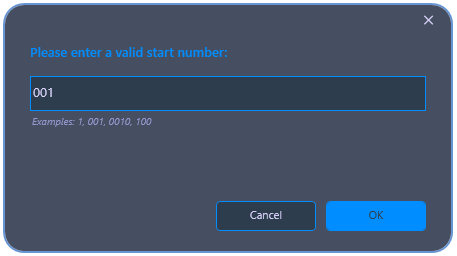
- If "Always confirm start number" is enabled in settings, you will be prompted by a dialog to enter or confirm the starting number.
- PiCri will traverse the pipeline in the chosen direction and assign sequential numbers to each weld, spool boundary, or part.

Command: PiCriGenericNumbering
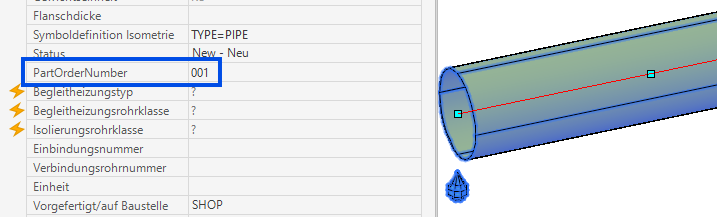
Notes: - If the pipeline has already been numbered and "Overwrite numbering" is disabled in settings, the command will display a warning and abort. - Spool numbering groups parts into spool segments and assigns a spool number to each segment. - Part numbering writes to a custom property (configurable in settings; the property must be added to the "EngineeringItems" table in the project).