4.9.1. Match Geometry, Transfer Properties
On this page
Aligns the geometry values between two custom parts. Unlike the classic property brush, the geometry parameters stored in the Python script are adjusted here, so that the source and target part subsequently have the same shape. This is useful if a custom part was accidentally placed with different values during planning.

Ribbon button: Properties > Geometry
Command: PiCriMatchGeometry
Procedure:
- Start the command. Select the source object (the part with the correct geometry) and then the target object that is to be adjusted.
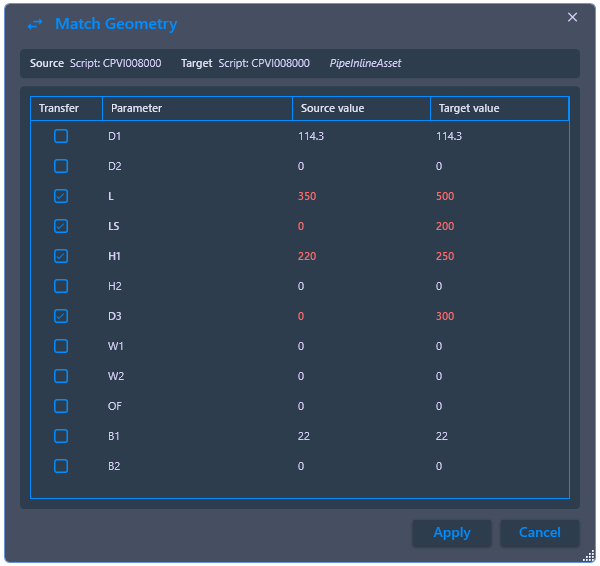
- In the comparison dialog, the geometry values of both parts are compared. Deviations between the two scripts are highlighted in red. A checkmark per line can be used to control which values are to be transferred from the source to the target object.
- Click Apply. The script of the target object is immediately re-evaluated with the transferred values, and the geometry adjusts accordingly. The process can be repeated as often as desired.