7.3.3. How can I display additional columns in the MTO?
On this page
Adapting the MTO report templates for additional columns
In this guide you will learn how to customize MTO reports (Material Take-Off) individually in order to output additional component properties in separate columns. This enables a more detailed material evaluation directly from your Plant 3D data.
Prerequisites
- You have access to the local installation directory of the plugins.
- Microsoft Excel is installed on your system.
- The corresponding components have the properties that you want to export.
Step-by-step instructions
-
Open the storage location of the report templates
Each extension (e.g. Sikla) has its own template. In Windows Explorer, navigate to the corresponding directory. Using the Sikla extension as an example, you will find the file under the following path:
C:\Users\[USERNAME]\AppData\Roaming\Autodesk\ApplicationPlugins\SuCri_Module2.bundle.old\Contents\Vendors\SiklaIn this folder, look for the file: MTOTemplate.xlsx
-
Open and edit the template
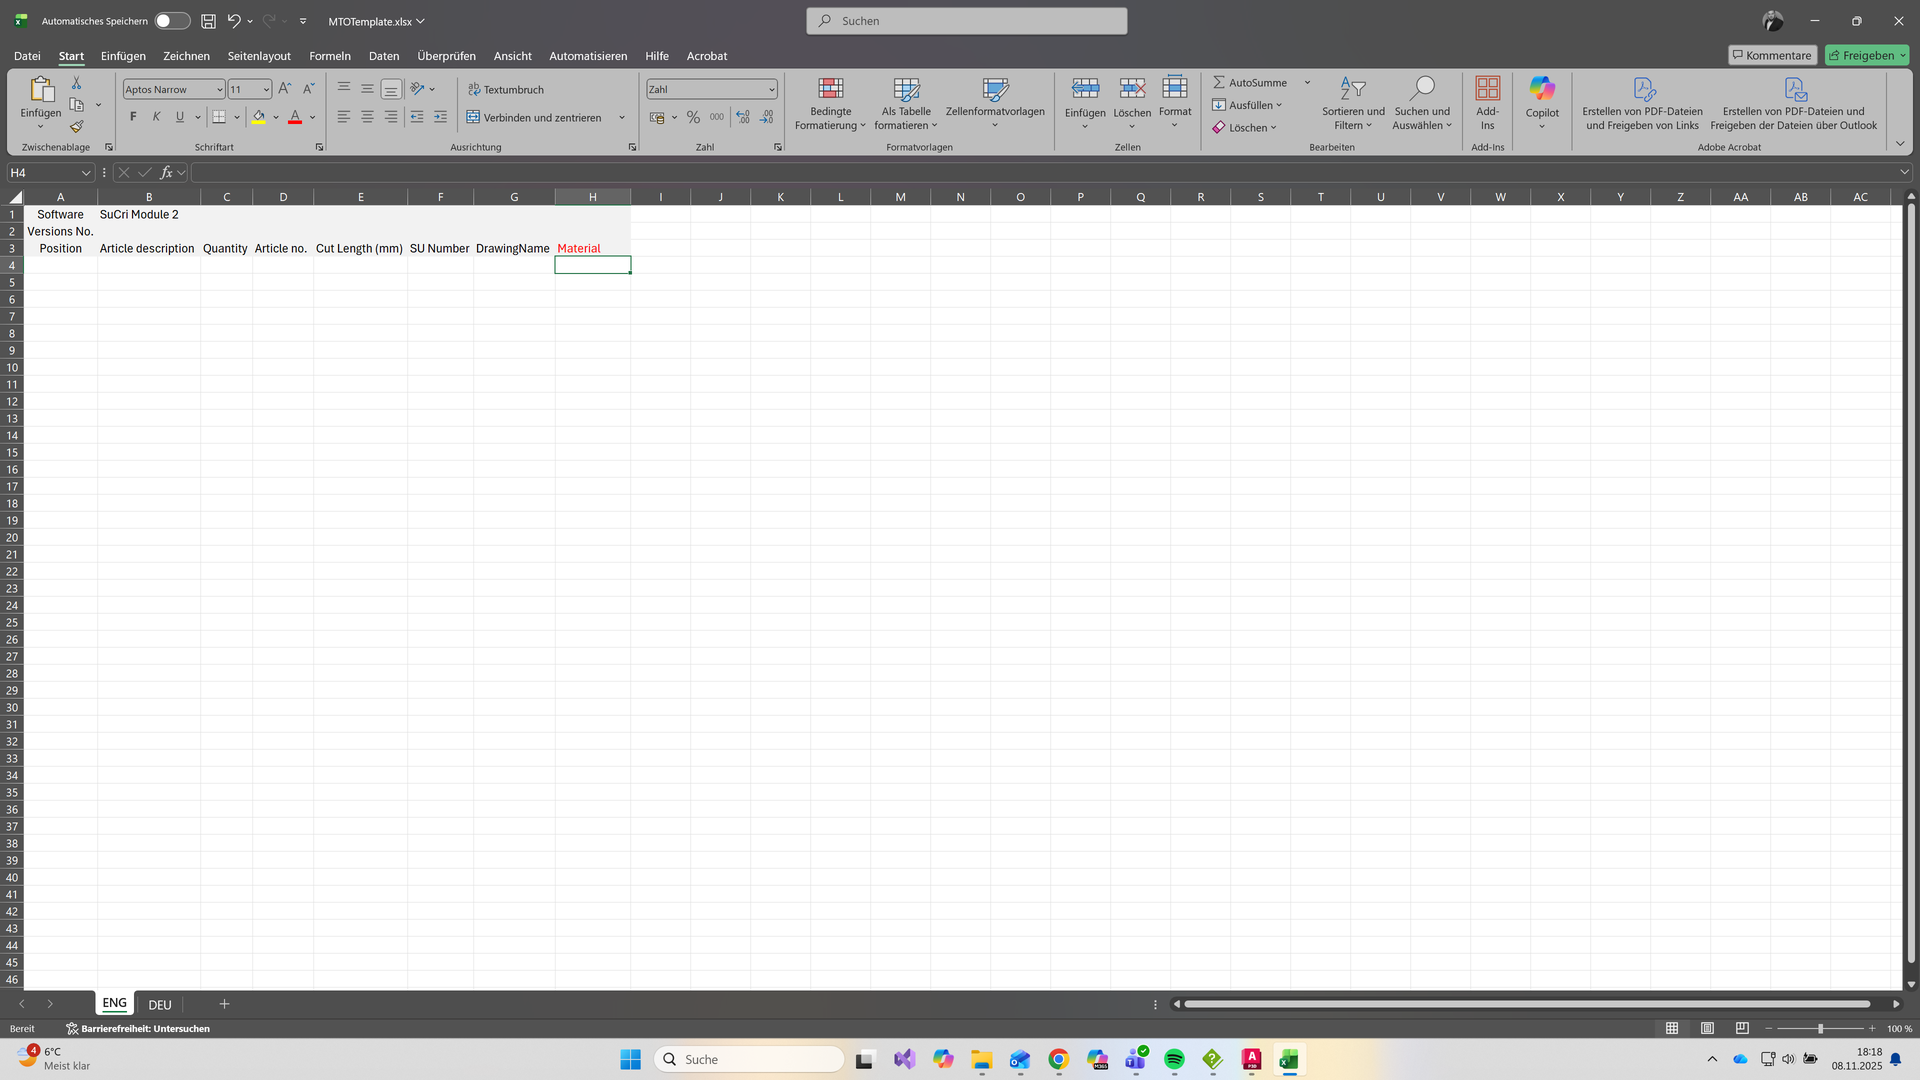
Open the file MTOTemplate.xlsx in Excel. Here you see the predefined columns and their current mappings.
-
Add a new column
Insert a new column to the right of the existing columns. As the column header, use exactly the name of the property that you want to read out (e.g. Material, Length or Weight). The system automatically pulls the corresponding values from the component properties.
Expected result: The new column is defined in the Excel template with the correct property name as header.
-
Save and check the test result
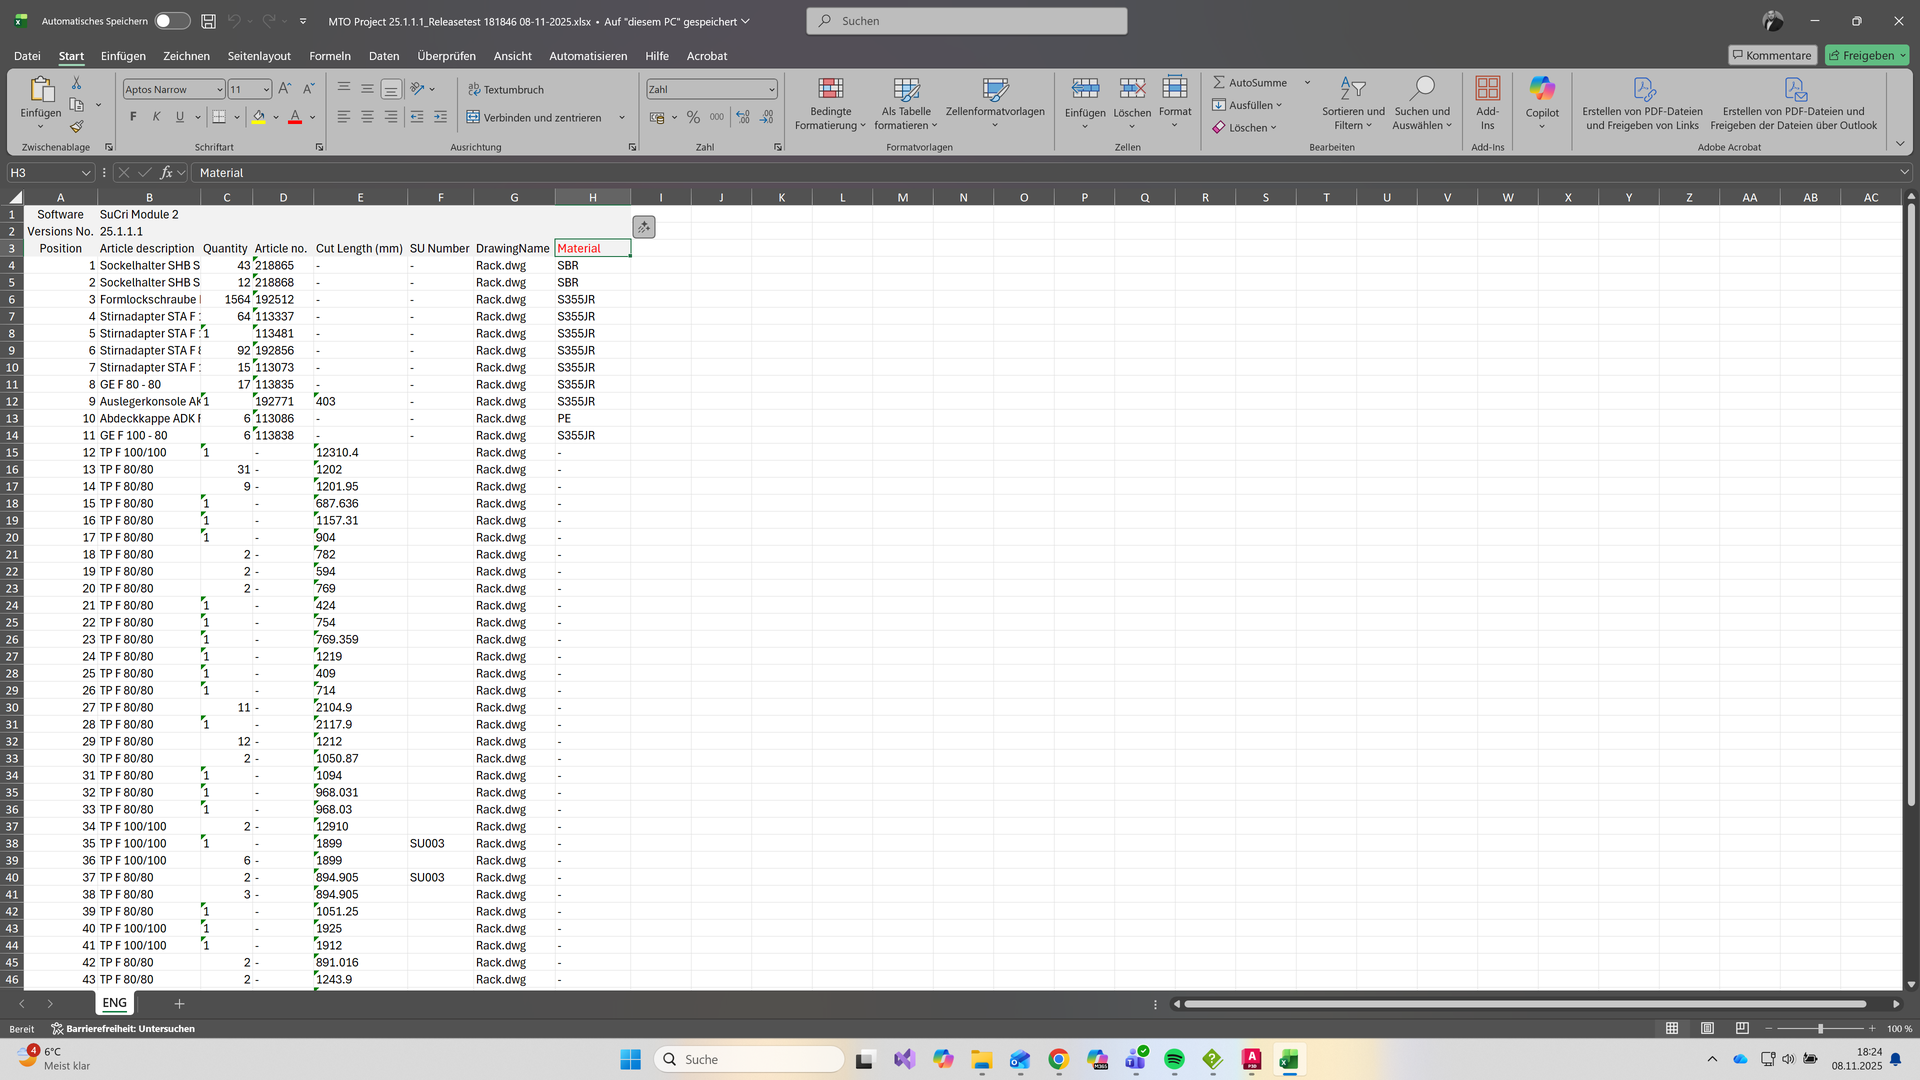
Save the changes in the Excel file and run the report again in Plant 3D / SuCri.
Expected result: The generated MTO report now contains the newly defined column with the correct data.
Important notes
- Backup copy: Always test modifications on a copy of the original file in order to maintain the consistency of the system.
- Naming: Pay attention to the exact spelling of the property names so that the data mapping works without errors.
- Standards: Store your customized standards in the project folder in order to easily transfer them to other projects.
Troubleshooting
- Column remains empty: Check whether the column name in the Excel template matches exactly the internal property name in Plant 3D.
- Template is not found: Make sure that you are working in the correct vendor folder of the currently used extension.