4.2.3. Replace (SuCri2ReplaceExistingSupport)
On this page
Overview
With the Replace function, you efficiently exchange existing primary supports in the selected drawings of the project using a replace map. This enables automated switching between different support types of your active pipe class based on their family names. You maintain the replace map in the SuCri settings.
Where can I find the function?
"SuCri" tab > "Module 2" panel > manufacturer button of your licensed catalog > Dashboard > Quick Access > Replace.
Alternatively, in the SuCri tool palette under Project > Replace. You open the palette in the Dashboard using the pin icon in the title bar ("Pin to tool palette"). You can also enter the SuCri2ReplaceExistingSupport command directly in the command line.
Plant 3D™ command
Property | Value |
| Command | SuCri2ReplaceExistingSupport |
Icon | |
| Ribbon | SuCri > Module 2 > manufacturer button > Dashboard > Quick Access > Replace |
| Tool palette | Project > Replace |
| Keyboard shortcut | not assigned |
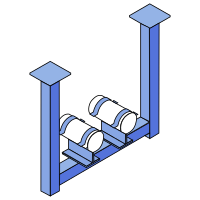
Video
How it works in detail
The following example describes replacing "clamps" (Schellen) with "pipe shoes" (Rohrschuhe).
1. Open the replace map
- Click the SuCri tab > Settings panel > Settings (alternatively the
SuCriSettingscommand). - Select the Module 2 area and, within it, the Replace map tab.
Result: The table with the columns "Original support (family name)" and "New support (family name)" is displayed.
2. Define replacement rules
- Click Add to create a new row.
Enter the rule:
- Original support (family name): family name of the current support (e.g.
Schellen). - New support (family name): family name of the new support (e.g.
Rohrschuhe).
- Original support (family name): family name of the current support (e.g.
- Click Save. The message "Saved." confirms the operation.
Result: The rules are stored and will be used the next time you replace. - Optionally, you can exchange the table as an Excel file with Import from Excel… or Export to Excel…. After an import, check the values and click Save.
3. Running the replacement process
- Start Replace via the Dashboard, the tool palette or the command line.
Result: The Select Drawings dialog opens. - Under Drawing Source, select Current Drawing or Project and, for Project, mark the desired drawings. Locked drawings are grayed out. Confirm with OK.
Result: SuCri replaces the supports according to the table, displays the progress and saves each processed drawing automatically. - SuCri then offers to save an Excel report of the replaced supports ("Save Excel Report" dialog, file name starting with "Support Replaced Project").
- Check the result in your drawings.
Result: The old supports have been replaced by the new components from the pipe class.
Application examples
Example 1: Project-wide type change
According to the project specification, all clamps of a family are to be replaced by pipe shoes. You enter the rule in the replace map and run Replace with the drawing source Project for all drawings.
Example 2: Converting only one drawing
With the drawing source Current Drawing, the replacement only affects the open drawing.
Tips and best practices
- Exact spelling: The family names must match character for character (including upper/lower case and spaces). It is best to copy them directly from the Properties of the components.
- Data backup: Always create a backup copy of your project before running the command, as SuCri saves the drawings automatically.
- Compatibility: Make sure that the new components are stored in the active pipe class for the respective pipe diameters.
- Report layout: The layout of the Excel report is defined by the export template (Settings > Module 2 > Export templates).
- Notification window suppressed: During replacement, SuCri does not show a notification window for the nominal diameter check; however, unsuitable supports are displayed in red.
Troubleshooting
- "No support has been replaced.": Check whether the original family name in the replace map exactly matches the entry in the AutoCAD properties and whether the table has been saved.
- "Cannot replace support …": The new support is not available for this position. Check whether it is stored in the active pipe class for the pipe diameter.
- "Cannot save …, please try again": The drawing is locked or read-only. Have other users close it and repeat the operation.
- Incorrect positioning: If the new supports appear offset, check the insertion points and parameters in the Spec Editor.
Related articles
- Support, replaces a single support interactively.
- Automatic nominal diameter check, checks the clamping range of replaced supports.
- Load settings (SuCri2LoadSetting), describes all tabs of the settings.
Copyright © 2026 by IntegaDesign GmbH. All Rights Reserved.