4.2.11. Support + Clamping system (SuCri2AutoSelectSupportClamp)
On this page
Overview
With the Support + Clamping system function, you place a support for a pipe on a steel structure in AutoCAD Plant 3D together with the matching clamp that fastens the support to the profile, all in one pass. You only select the steel structure and the pipe; SuCri suggests the matching components based on the geometry and the pipe class.
Where can I find the function?
"SuCri" tab > "Module 2" panel > manufacturer button of your licensed catalog > Dashboard > Turbo Tools > Support+Clamp.
Alternatively, in the SuCri tool palette under Single Placement > Support + Clamp. You open the palette in the Dashboard using the pin icon in the title bar ("Pin to tool palette"). You can also enter the SuCri2AutoSelectSupportClamp command directly in the command line.
Plant 3D™ command
Property | Value |
| Command | SuCri2AutoSelectSupportClamp |
Icon | |
| Ribbon | SuCri > Module 2 > manufacturer button > Dashboard > Turbo Tools > Support+Clamp |
| Tool palette | Single Placement > Support + Clamp |
| Keyboard shortcut | not assigned |
Video
How it works in detail
- Start the function: Start Support + Clamping system via the Dashboard, the tool palette or the command line.
- "Select Steel Structure:" Click the profile to which the support is to be fastened. The profile may also be located in an Xref.
- "Select Support/Pipe:" Click the pipe to place a new support. Click an existing support to replace it.
- "Select available support:" SuCri lists the matching supports in the command line. Press Enter to accept the suggestion, or choose another option.
- "Select available clamp:" SuCri then lists the matching clamps. Press Enter to accept the suggestion; choose "0. No Clamp" to do without a clamp.
Expected result: the support and clamp are placed in the model.
When replacing an existing support, SuCri keeps the properties entered in the Properties kept when replacing a support setting (default value: Tag, SuNo).
Application examples
Example 1: Supporting a pipe on a crossbeam
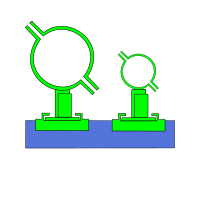
A pipe runs above a crossbeam. You first select the beam, then the pipe, and accept the suggested support and the suggested clamp. The support and clamp are placed in one pass.
Example 2: Replacing an existing support including its clamp
A support that has already been placed is to be replaced by a different type. You select the beam and then the existing support; SuCri replaces it and then asks for the clamp.
Tips and best practices
- Libraries: The plugin accesses the stored component catalogs and the pipe class; make sure that the required supports and clamps are available there.
- Limiting clamps to the pipe class: With the Limit clamps to current spec setting (Settings > Module 2 > General, Turbo Tools group, default value: disabled), only clamps from the current pipe class are offered.
- Beam moved: The support and clamp do not automatically adapt to a new beam position. Run the command again after moving the beam.
- Collision check: Always perform a visual check or an automated collision check after placement.
- Multiple pipes: For many pipes on one structure, use Support + Clamping system [x].
Troubleshooting
- "Cannot select structure, exit.": No valid steel structure was selected. Start the command again and click directly on a profile.
- "Please select only Support/Pipe type": A different object was selected in the second step. Click a pipe or an existing support.
- "Cannot select clamp": No support could be placed, so no clamp is selected either. Check the preceding messages, for example "Cannot find suitable support. Make sure the distance is valid."
- System is not generated: Check whether the pipe diameter or the beam profile is stored in the SuCri libraries or the pipe class.
- Command does not respond: Make sure that the license is active and the plugin has been loaded correctly. Restarting the CAD software can help.
Related articles
- Support, places only the support.
- Clamping system, places the clamp on an existing support.
- Support + Clamping system [x], places supports with clamps for multiple pipes.
- Attaching, combines components into an assembly and assigns the SU number.
Copyright © 2026 by IntegaDesign GmbH. All Rights Reserved.